Uncategorized
Convenient Spare Tire Storage | Best Rear Tire Carriers For Subaru
CONVENIENT SPARE TIRE STORAGE – BEST REAR TIRE CARRIERS FOR SUBARU By Ben Boxer If you’ve been considering a rear tire carrier for your Subaru,
Many people really enjoy driving a Subaru for the versatility that they offer. Most newer Subaru models are capable of getting 30mpg while having full time all wheel drive. They’re easy to drive, comfortable, and fit into parking spots with ease. Even when Subaru owners decide they need more off-road performance, they rarely decide to switch to a “real 4×4” and just lift their vehicle instead because of how versatile they are. But it’s not that simple.
I’m going to cover some really important tips that apply when trying to take your Subaru offroad.
Here are the vital offroad mods that I’ll discuss:
Some folks think that because a Subaru is all wheel drive that it is basically the same as a 4wd car. But, this isn’t quite the case. A Subaru can hit some really impressive trails but they do have limitations as to how far they can be modified and driven when compared to a 4×4.
The biggest difference is that 4×4’s were intended for off-road abuse – Subarus were not (even the Wilderness Edition has its limitations.) This means that a Subaru is going to lack basic things that your average truck or 4×4 will come from the factory with. Things as simple as recovery points, beefier axles, stronger frames, and a low range transfer case are very hard to substitute in off-road situations.
In my opinion, the biggest limitation for Subarus is the lack of a low-range gear. Without being able to use lower gearing to spin larger tires, you’re limited to the amount of tire sidewall you can fit on the car. Even if you completely removed the fenders and could physically fit a 33 inch tire under your Outback, the car simply wouldn’t be able to spin the tires fast enough or with enough torque. You may get the vehicle into a steep section and the engine would start to bog down and completely die.
I’ve experienced bogging on a steep hill with only 29 inch tires. With a 4wd truck you have the option to engage the transfer case and shift into a much lower range of gears for those situations where you need slow moving power. In extreme cases when someone wants to run an even bigger tire, 4×4’s can be easily re-geared to handle them. Unfortunately, that’s not an option with Subarus. Even if someone was willing to split their transmission open to install a new set of gears, there’s no aftermarket option to replace them with.

The axle shafts on a Subaru are also much smaller and have the potential to break when under heavy load than most axles on 4×4’s. Even on a tire that’s only 1.5 inches larger than stock, I’ve seen Subaru axles snap relatively easily when taken on off-road trails.
Many 4×4’s also have solid axles in the rear at minimum, and some are equipped with straight axles in both the front and rear. Solid axles are stronger and provide better wheel contact when climbing uneven terrain. As one wheel is on a high point, the other wheel is pushed down to contact the ground. The independent suspension that Subarus have is more comfortable than solid axles. But independent suspensions don’t give you the “flex” that you need to maintain tire contact at all times on the trails. You may have seen a Subaru experience wheel-lift when trying to navigate uneven terrain. This is exactly what you don’t want in off-road scenarios. The wheel that’s off the ground will simply begin to spin while the other tire that’s still on the ground won’t move.
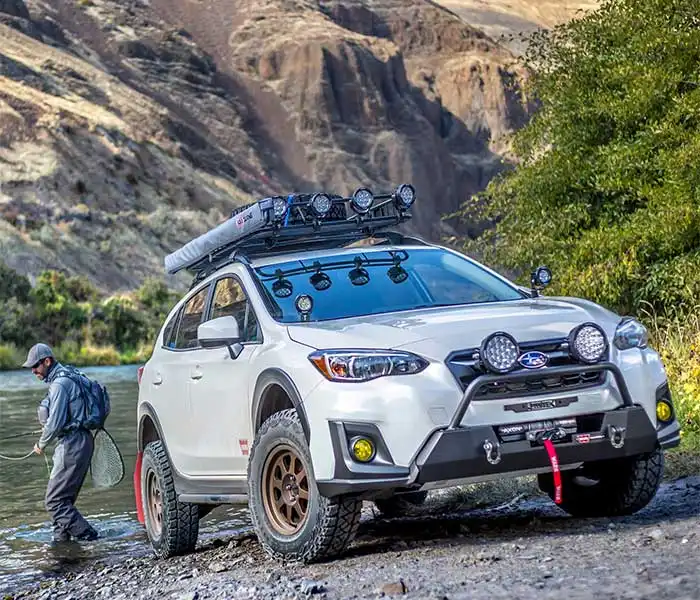
There are a lot of limitations when you compare a Subaru to a “real” wheeler. But that doesn’t mean you can’t build a nice off-road rig using effort and strategy. Using a few modifications, Subarus can be equipped to become the perfect vehicle for light trail use.
When we build a vehicle for off-road use, a lift kit is one of the first modifications we install. It’s the first key part in the process of making your car more capable. A lift kit will give you more ground clearance and allow you to fit larger tires with less rubbing issues.
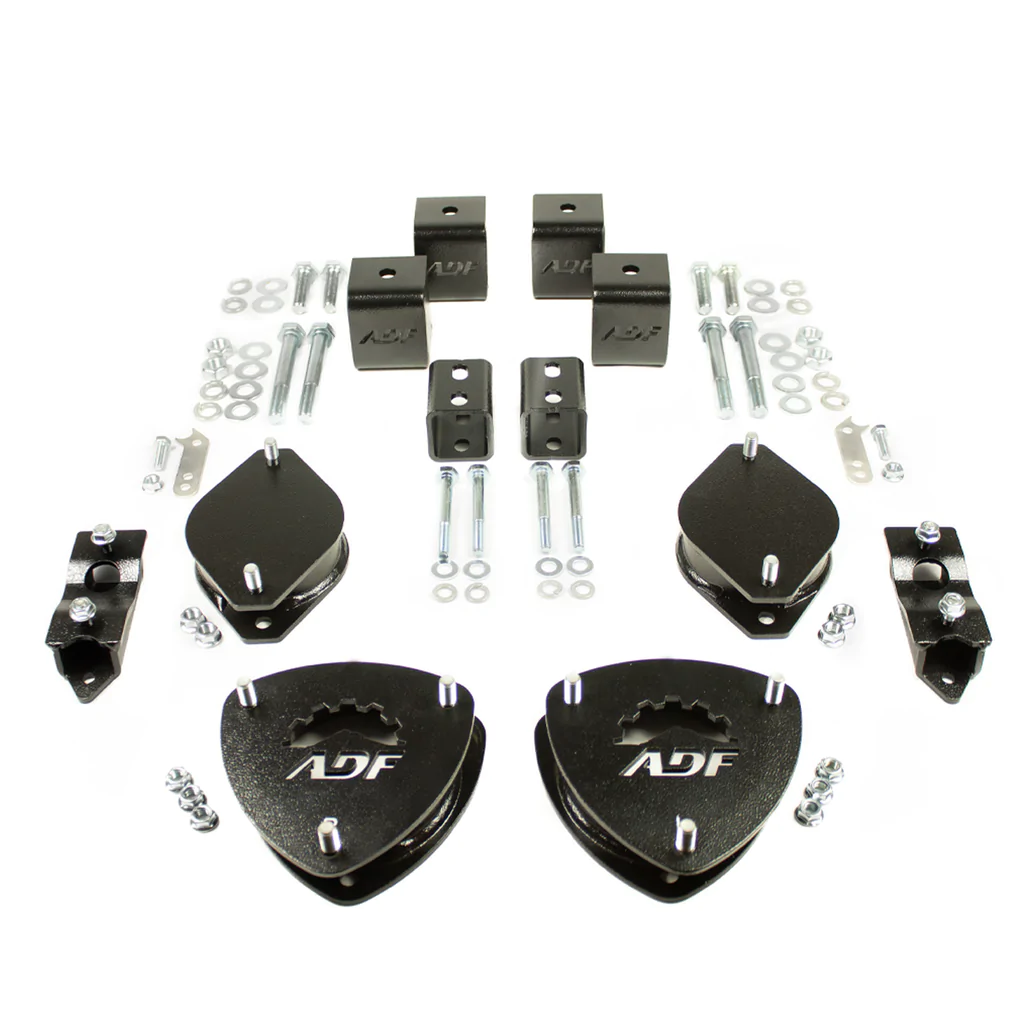
There are all sorts of lift kit options available, but a simple strut spacer kit or spring lift will do just fine for most applications. We recommend lifting a Subaru no more than 2 inches. Once you go past 2 inches, the CV axles will be angled past their natural limits and can fail very quickly. There are ways to lift more than that, but it does require more than twice the work and is much more expensive. We feel that most people will get everything they need out of the car with a 2 inch lift. But it’s totally okay to go further than that if you’re aware of the added cost. In order to decide what size of lift kit would be best for you, check out my article that I wrote in collaboration with Patrick from ADF about the best Subaru lift kit sizes.
If you’re planning to lift your Subie, there’s a wide range of good options out there now. We suggest getting a lift kit from Primitive Racing, Anderson Design & Fabrication (ADF,) or LP Aventure. Again, there are other kits to choose from as well. If you’d like to see a more comprehensive list of options, check out this article where we go more in depth on the Subaru kits available: Our Favorite Subaru Lift Kits
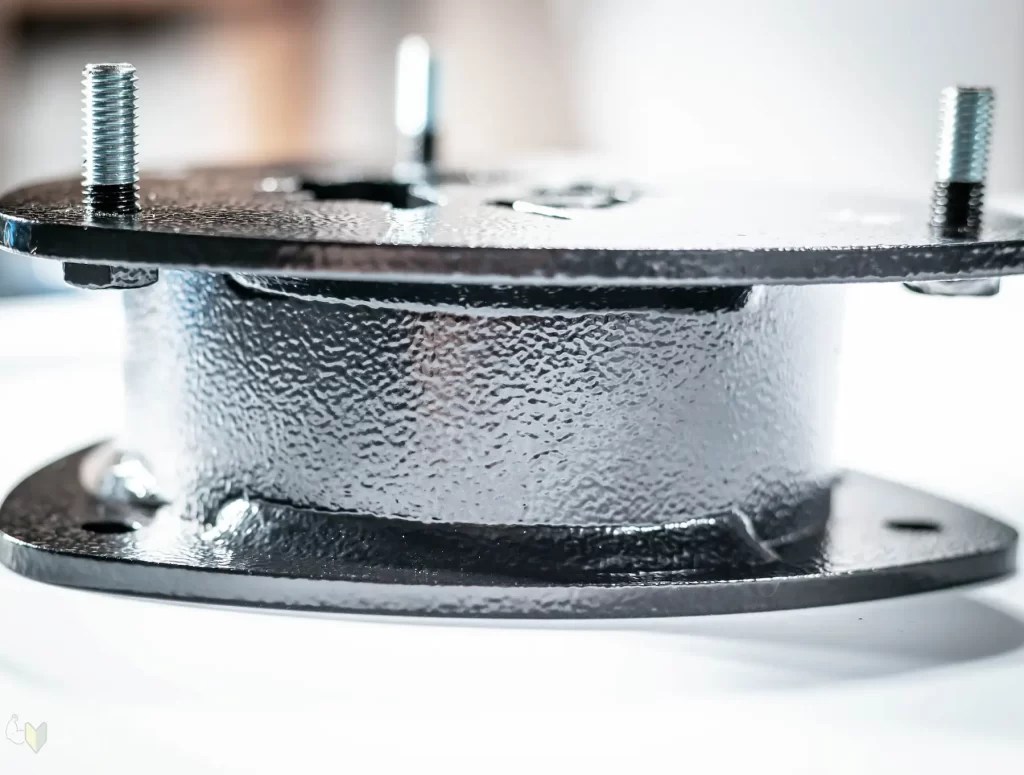
Below, you can see what a spacer lift looks like. These are one of the most reliable and easy ways to lift a Subaru. They space the struts away from the unibody and space the subframe down to help correct the CV axle geometry. In addition to being reliable and simple, they’re also one of the most affordable ways to get your Subaru lifted. They typically start at around $300 and usually cap out at about $700. They can cost more once you exceed a two inch lift though as there are more components required.
I am firmly of the opinion that a set of skid plates are one of the most important accessories you can purchase to make your car more capable and safe for the trails. During off-road adventures or even on poorly maintained roads, skid plates absorb the brunt of potential damage, preventing costly and potentially dangerous impacts that could lead to leaks, mechanical failures, or immobilization. Skid plates earn their place on my list by ultimately ensuring a safer and more reliable driving experience, whether on or off the beaten path.
The level of confidence that a set of skid plates has given me on the trails is unmatched. I never feel cautious about trying to get up a certain road or obstacle. I personally have skid plates from the front to back of my vehicle including a front skid, transmission pan skid, and a rear diff skid plate. My opinion is that a front skid plate and transmission pan skid plate should be the first priority. But whatever fits into a person’s budget first is what they should purchase.
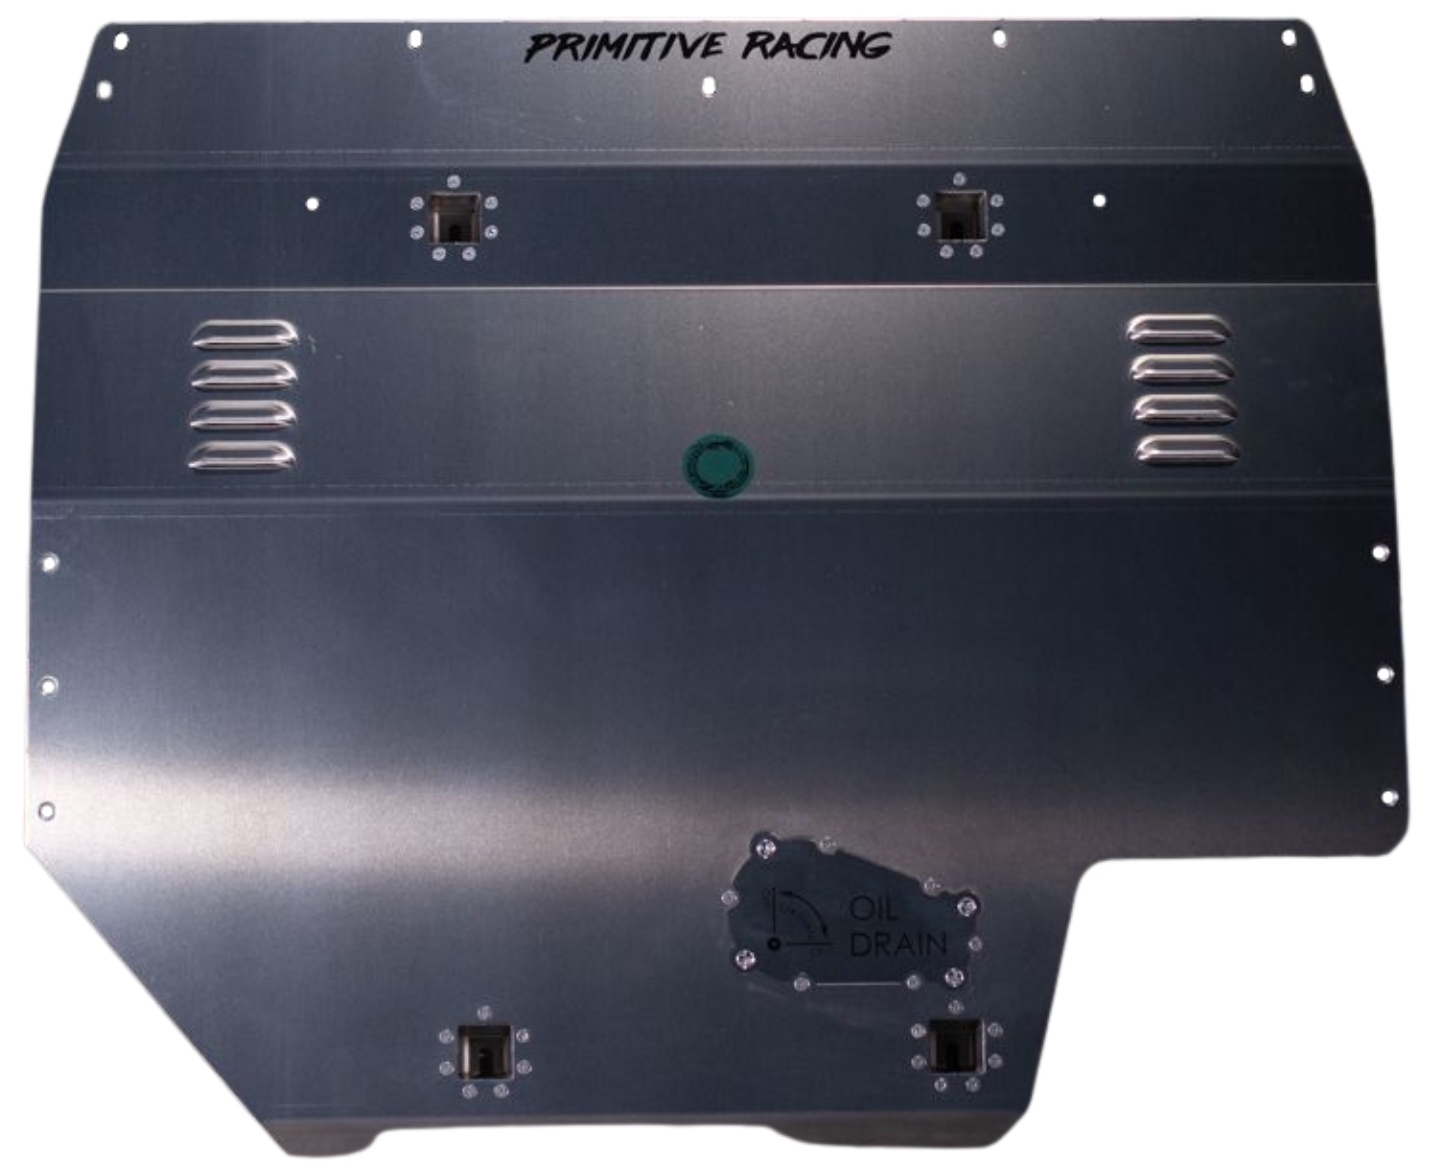
There are a few good options out there for skid plates. But I personally use the Primitive Racing skid plates. They’re the best bang for the buck and are made using high quality materials. The Anderson Design & Fabrication skid plates are another great option as well if the Primitive options don’t work for you.
If you want to check out the 5 year review of my Primitive skid plate, you can check it out HERE.
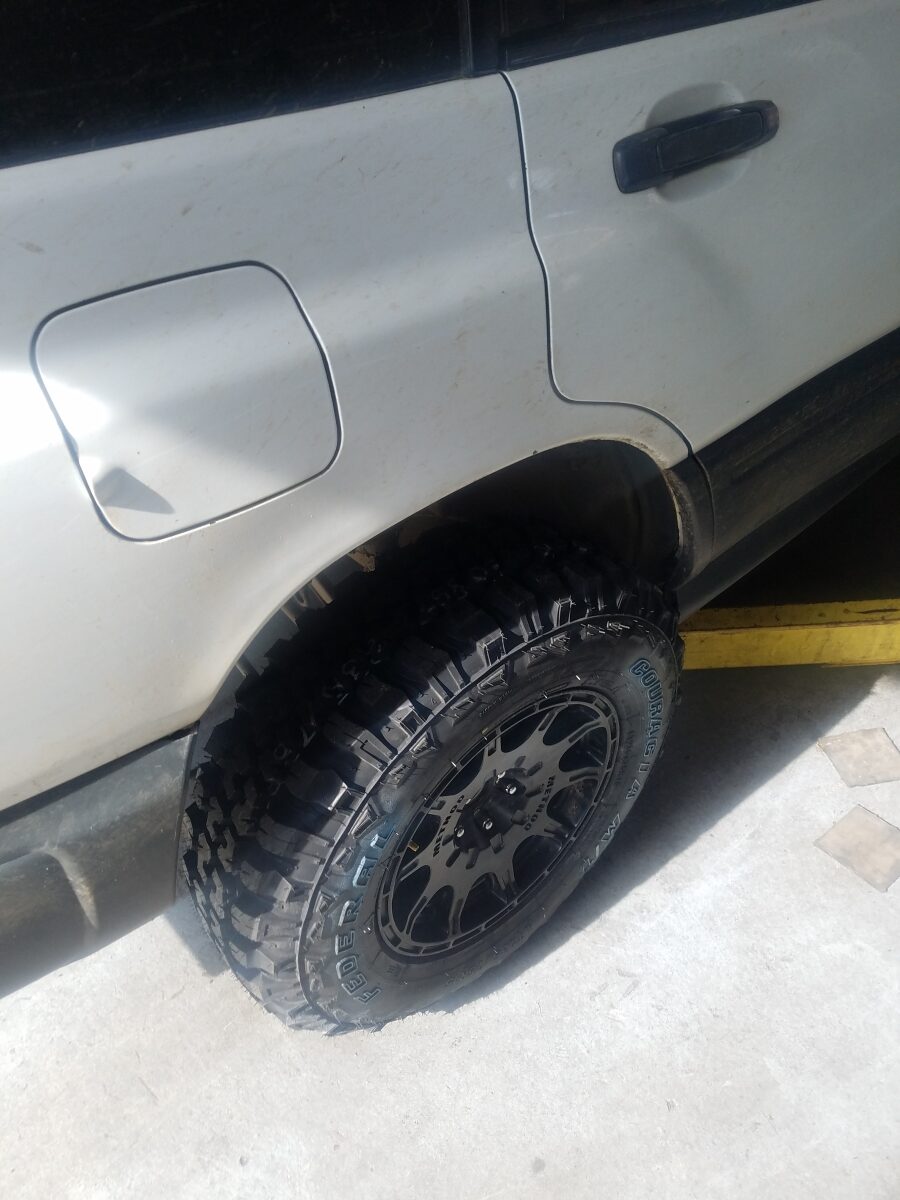
One of the next most effective off-road mods you can do for your Subaru is a fresh set of bigger all-terrain tires. The added tread and the aggressive sidewalls alone can have a big impact on your vehicle’s capabilities. But before selecting a new tire, we have to keep a few things in mind.
While you can fit a slightly bigger tire on your Subaru, we typically recommend not exceeding the stock overall diameter by more than 1.5-2 inches. Even if you’re willing to cut and hammer your Subie to fit them, a tire that weighs that much more than stock will be too much for the engine and transmission to handle effectively. Not only will you reduce your vehicle’s power, and fuel economy, but you’ll likely overheat the transmission with a tire that is too heavy if you push it hard on trails.
If possible, we also recommend sizing down your wheels. Depending on your brake size you may not be able to size down too much. But many folks prefer to go down one to two rim sizes from stock. For example, if an Outback Premium came with the 17’s, a 16 inch wheel is a great upgrade and some folks will go down to 15’s.
Once you’ve sized down your wheels, you can now get a tire that has the same diameter but more sidewall. Of course, before doing this you should talk with a professional and take measurements to make sure that your brakes will actually clear the smaller wheel. Note that aftermarket “rally” wheels are usually designed with more room to accommodate brakes. Sizing down using a smaller stock wheel might not be possible.
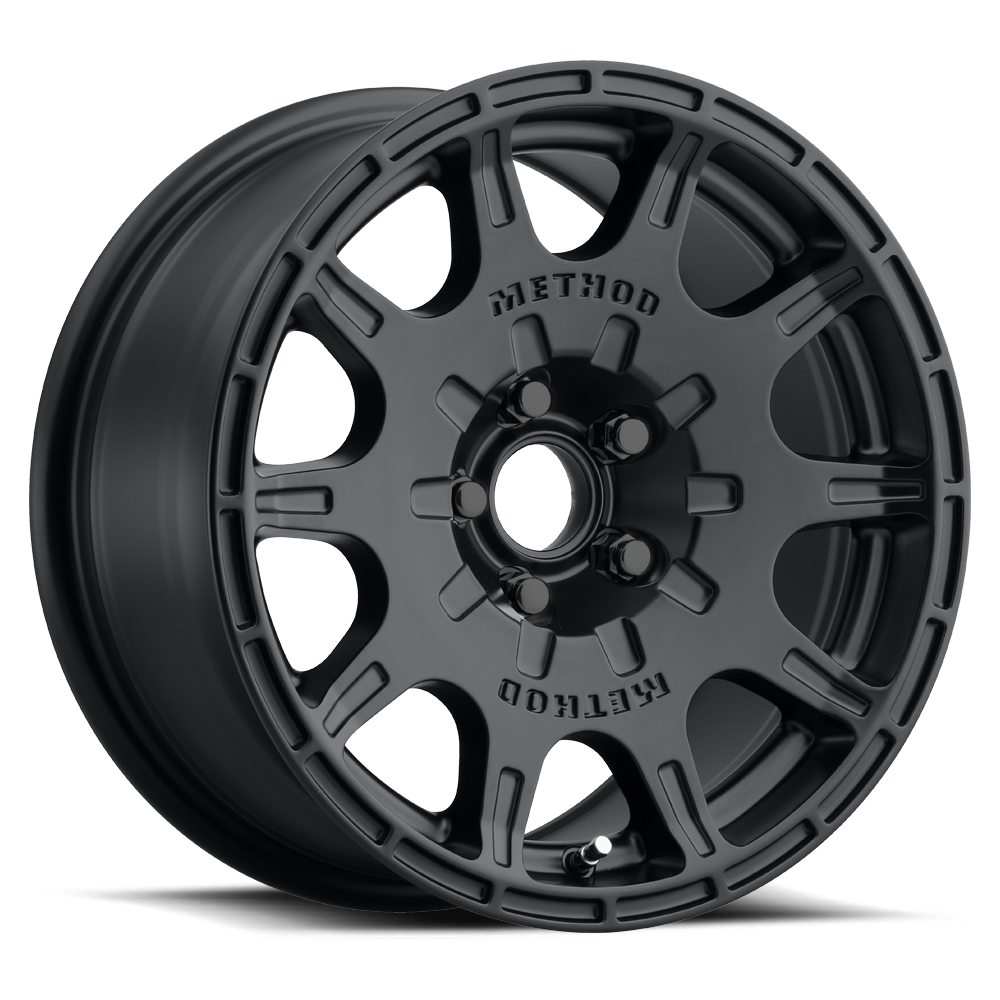
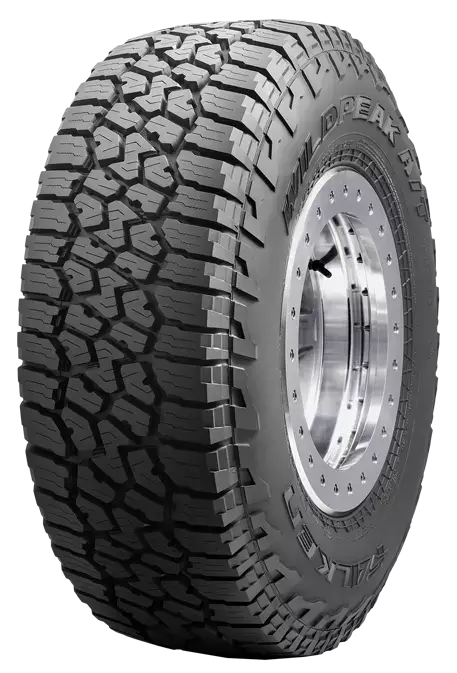
A really popular wheel/tire combination for Outbacks, Crosstreks, and Foresters is a 15 inch Method MR502 or Black Rhino Boxer paired with a set of Falken Wildpeak AT3W 235/75R15 tires. Going down to that size wheel may not be doable for those who own certain models such as the Ascent, or anything with a larger brake kit. In those cases, we suggest going with a size like 16 or 17 inch. The 17 inch Method wheels with a 245/65R17 is very popular combination with many Subaru owners.
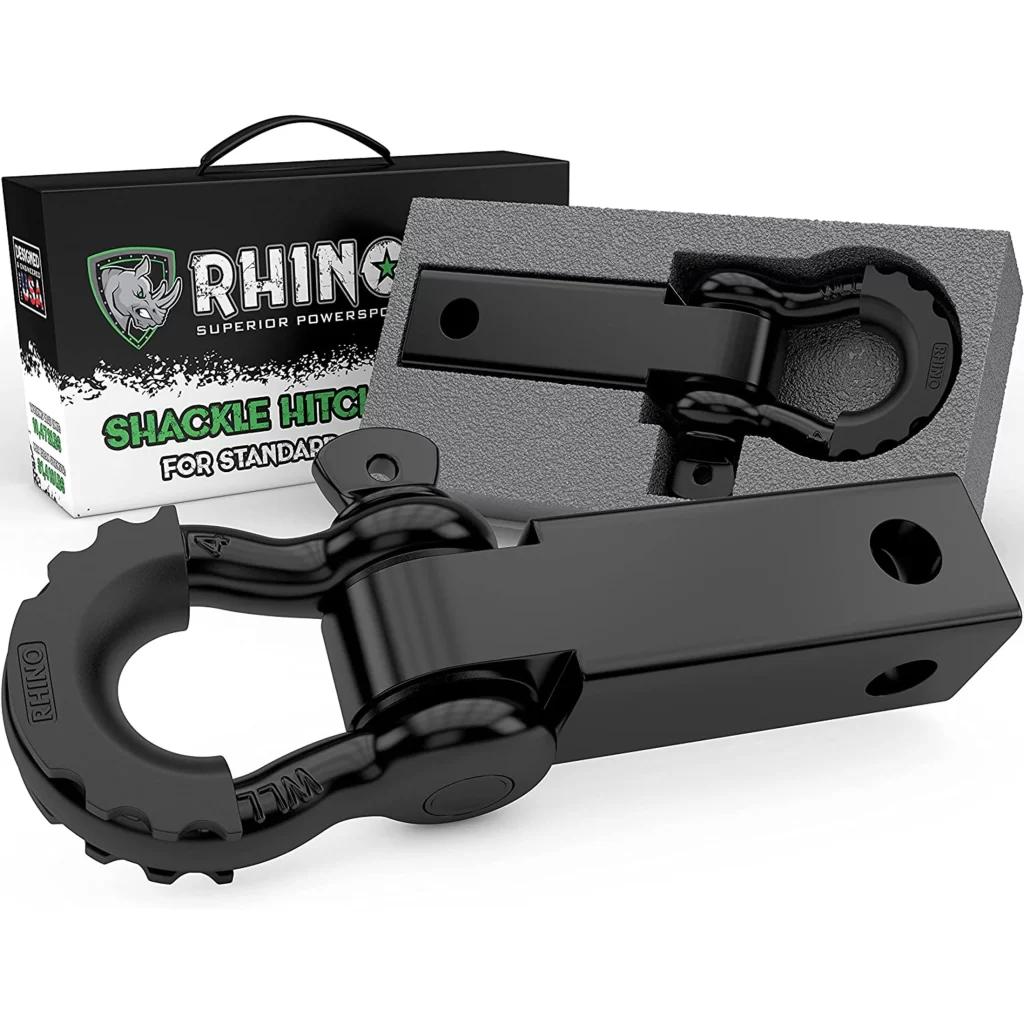
You may have seen that most Subarus have a hidden “tow point” behind the bumper skin. Many people will attach tow hooks to them and leave them hanging out. Unfortunately, this is NOT the proper place to recover a Subaru from when it needs more than a soft pull. I’ve personally seen one of those tie down points rip straight through a Crosstrek bumper while they were trying to pull it out of the snow.
These tie down points are there for two things: securing the vehicle during transportation from the factory, and slowly winching the vehicle onto a tow truck if needed. But they are not intended to be true recovery points that can take the abuse of being yanked on. If one of these comes loose during recovery, it becomes a high speed projectile with the ability to hurt someone.
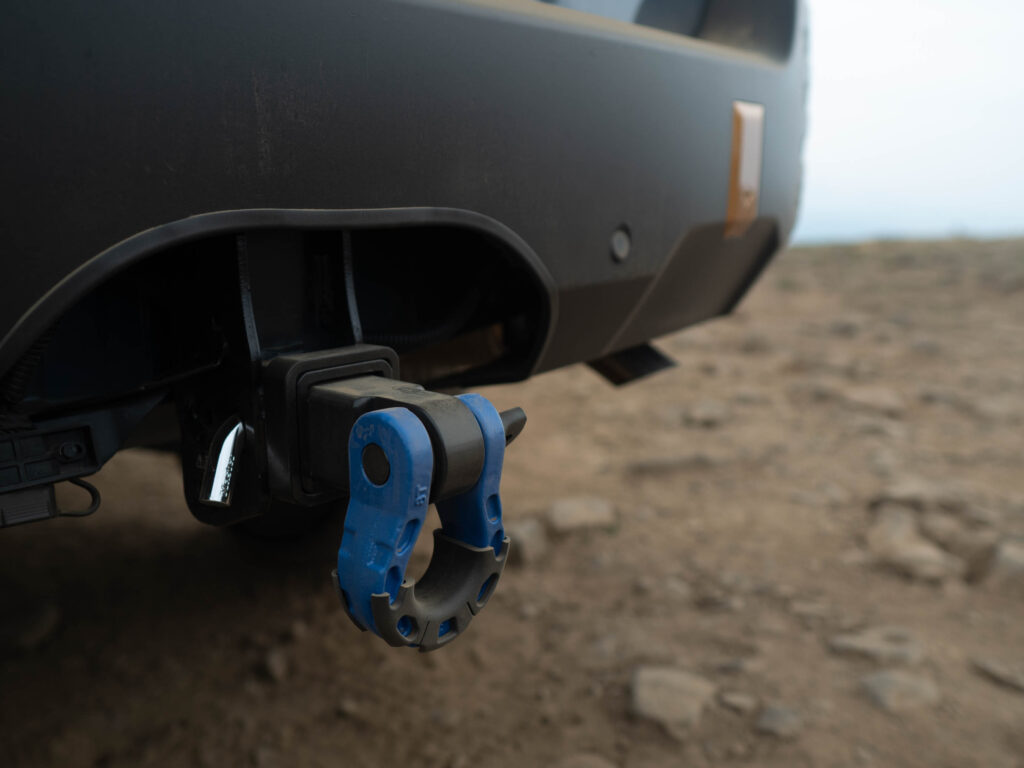
(Hitch receiver d ring shackle installed on my friend’s Outback Wilderness for safe recoveries)
There’s two really good ways to get around this problem on a Subaru. The easiest way to add a good recovery point to a Subaru is to purchase a tow hitch receiver and install it on your car. This will give you a frame mounted point for recovery. Once you have your hitch installed, you can purchase a recovery hitch receiver similar to the one below. These receivers can be yanked on with substantial force before ever failing.
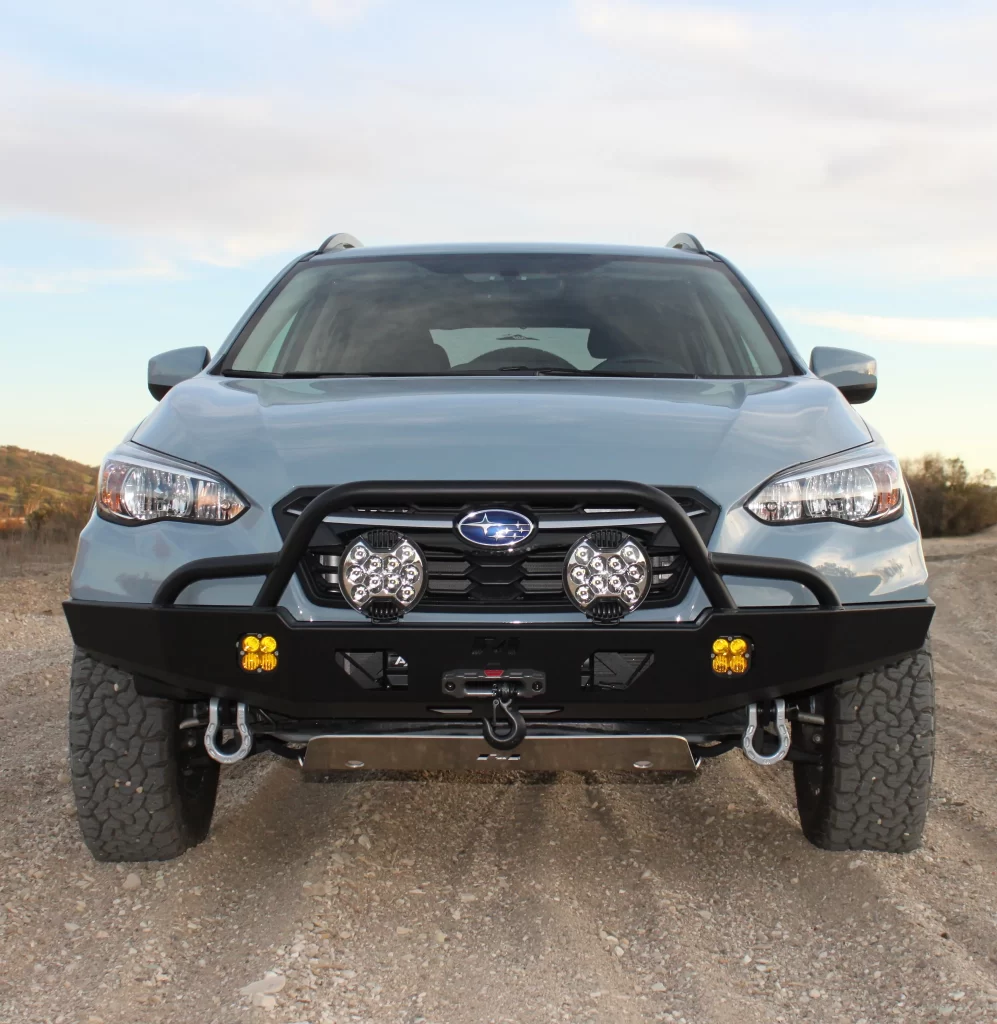
Installing a hitch is great for recovering in the rear, but what about up front? Unfortunately, adding recovery points in the front is a bit more difficult.
You can’t just install a $200 trailer hitch and call it a day the same way you can in the rear. You’ll need to have a full off-road bumper fabricated for you, or purchase a pre-built one that’s made specific for your Subaru. This isn’t a cheap undertaking but it does provide multiple benefits. An off-road bumper will give you recovery points, hi-lift jack points, added protection, and in most cases, a place to mount an electric winch for easy self recoveries.
If you’re planning to have a custom bumper built for you, expect the price of a basic build to start at somewhere around $500-600 dollars depending on your local market. Then be prepared to pay extra as you add accessories or elaborate design features. I paid a local guy $600 to build me a tube bumper with 2 recovery points and a heavy duty winch plate. Chances are, you can find a fabricator near you to do something similar.
In the event that you want to spend a little extra money and get something fancier, there are some companies that make pre-built off-road bumpers for Subies. My two favorite options that are currently on the market are the WARN hidden winch bumper, and the F44 Off-road Front Bumper. You can check them out below.
Notice how they both have recovery points for D ring shackles, and a spot to mount a winch. At this time, the F44 is only made for the Crosstrek. But the WARN is available for multiple Subaru models.
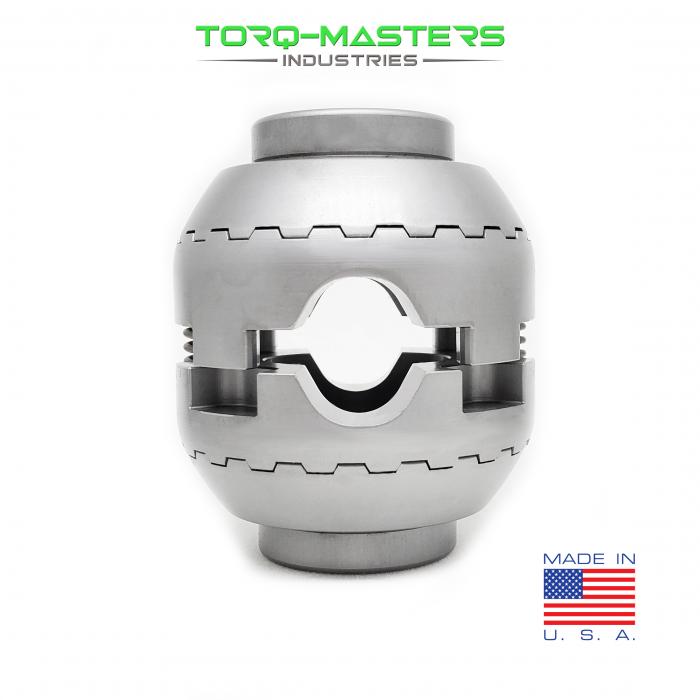
Up until recently, there were no locker options for Subaru owners. The best options we had were either welding the rear diff, or installing a limited slip differential in the rear. Fortunately, Torq Masters designed the Torq Locker – a rear locker for Subaru rear diffs and they’re pretty easy to install with basic tools and mechanical skills.
A locker will help reduce wheel spin in situations where one wheel is lifted off the ground. It helps “lock” the two axles together and spin in situations where an open diff will only spin the one tire that has the least resistance against it.

We recommend installing a Torq Locker if you plan to hit actual OHV trails that demand more performance from your car. If you are casually driving forest roads, it may not be necessary but having more capability is never a bad thing!
A word about drivability with the locker: these types of lockers can click while turning and it may be something that the average person finds annoying. However, we haven’t found it to be distracting at all and the benefits highly outweigh this small inconvenience. We sometimes forget that the locker is even there because it’s a very mild clicking sound.
Read my full Torq Locker installation and review article to see my overall thoughts on it.
There’s two very simple mods that can be done on most Subarus:
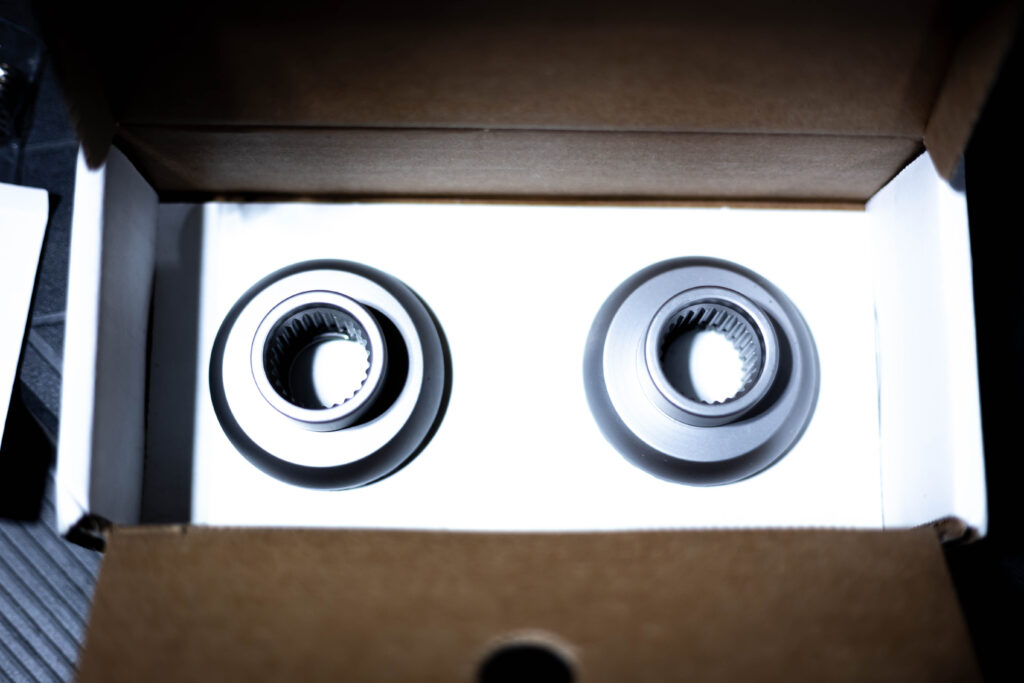
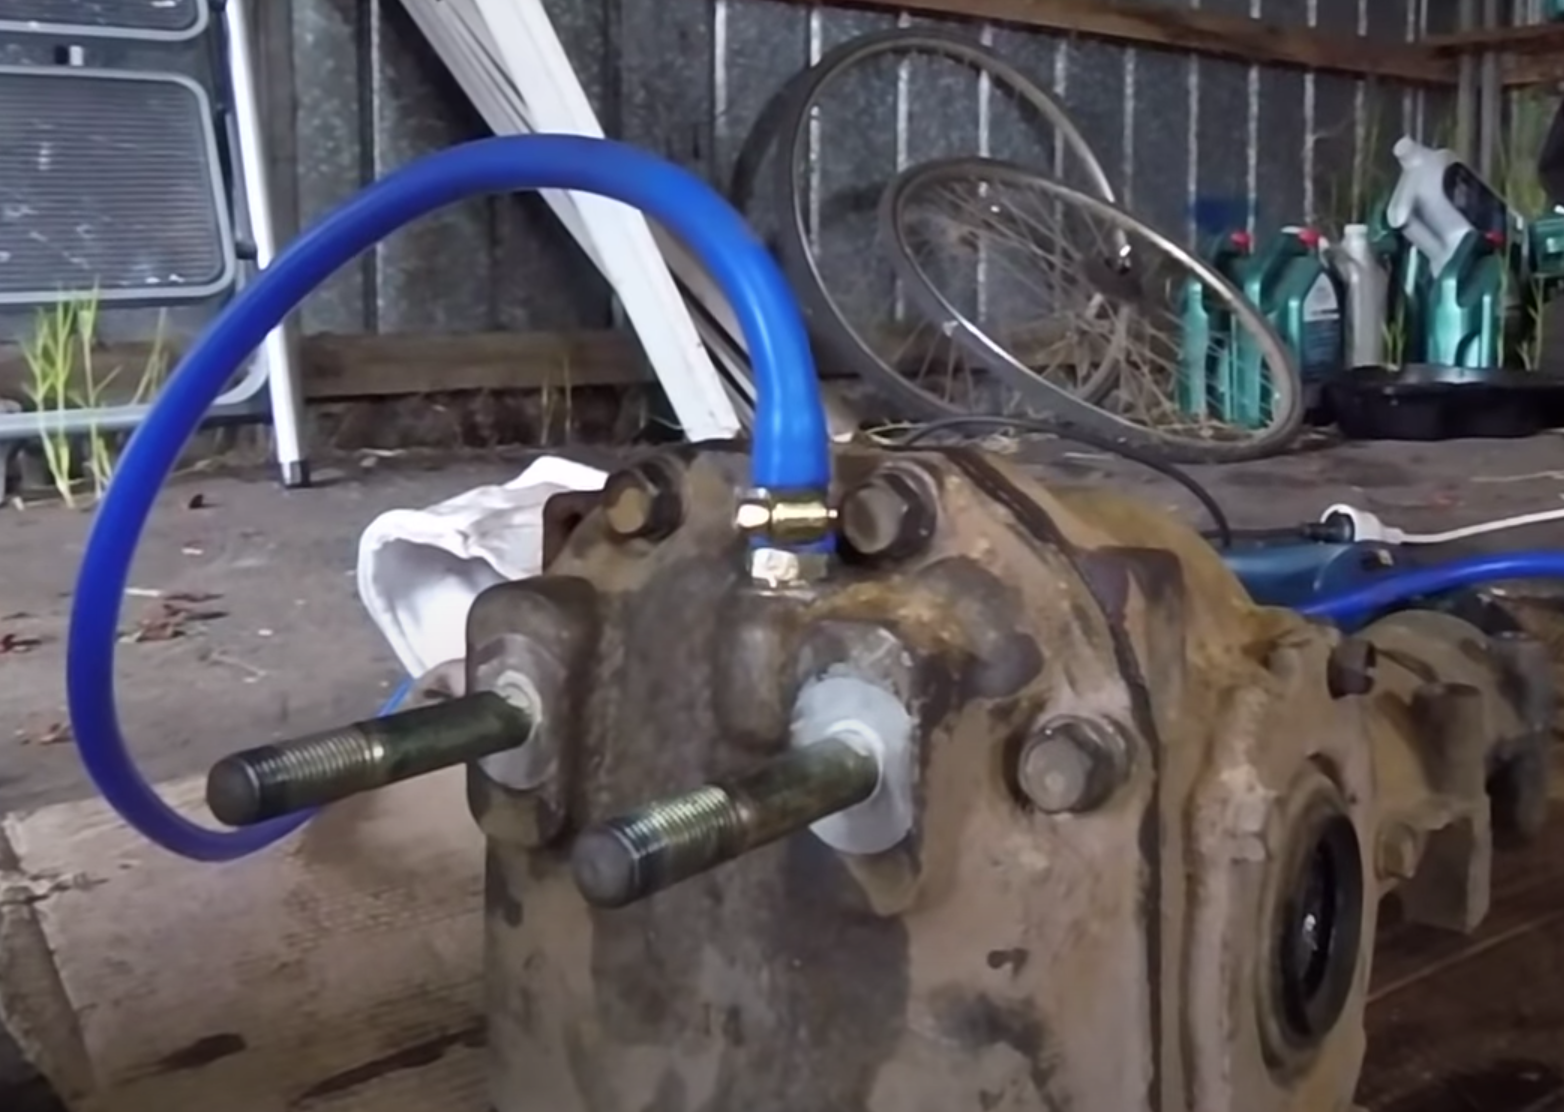
For roughly $30 I was able to install an extended diff breather hose on my Forester. It involved pulling the differential cover, drilling and tapping the hole for the factory breather. Then I used a brass hose fitting (5/16″ to 1/4″ NPT fitting) and silicone tubing to run the breather up into the spare tire compartment. I watched a really helpful video from Ignition Off-Road on youtube that gave me the general idea of what to use and how to install it. I did a couple of things different and added a small motorcycle fuel filter to the end to ensure a completely sterile line since I live in an area with a lot of dust. But I will link his video so you can check it out!
Here is what it looks like once it’s installed on the differential cover:

Once you have a rear diff breather installed, another easy DIY modification you can do is a simple ECU relocation. In my specific Subaru and many others, the ECU can be pulled out from under the floor panel in the passenger foot well and put up higher in the glove box. I can’t speak for the newer Subaru models, but in every single one that I’ve owned or help someone do this mod on, we’ve had more than enough wire loom to reach it up into a hole that we cut in the glove box.
Why would you do this? If you are ever unlucky enough to accidentally (or on purpose) get into deep enough water that causes it to begin leaking into the interior, one of the first places water will go is right into the floor boards – RIGHT where your ECU is located. Once the water hits it, it will be useless and your Subaru will be “bricked.” You won’t be able to start it, turn it on, or move the vehicle. It’s very difficult to get a new ECU in later model Subarus because they have to be programmed to the specific car before installation. You can’t just plug in a new one and go like in older cars. This is essentially a free modification that can save you thousands of dollars. I did it to my Subaru and within a few months, it paid off because I accidentally drove into a deep water-filled ditch that was covered by snow. My car would’ve been completely ruined if I had left my ECU in its original location.
I simply took a Dremel tool and cut out a hole in the back of my glove box. I then moved the ECU up into that hole to keep it far away from any moisture on the floor.
This video gives a pretty good illustration of where to put the ECU:

While Subarus aren’t quite as heavy duty as many 4×4’s from the factory, they can be modified to be very capable and reliable off-road. I have installed each of these mods on my car and have enjoyed the experiences I’ve been able to have with my Forester.
By utilizing these basic modifications, any Subaru owner can turn their car into something capable of visiting remote areas of wilderness! Hopefully this article has been helpful as you research getting your Subie ready for some off-pavement action.
Other Articles You May Find Helpful:
Convenient Spare Tire Storage | Best Rear Tire Carriers For Subaru
CONVENIENT SPARE TIRE STORAGE – BEST REAR TIRE CARRIERS FOR SUBARU By Ben Boxer If you’ve been considering a rear tire carrier for your Subaru,
Best All-Terrain Tires For Snow – (Crosstrek, Forester, & Outback Included)
Best All-Terrain Tires For Winter Use Get the best out of your tire this winter without sacrificing trail capability year-round. While an all-terrain tire is
Federal Couragia MT Tires | Why We Bought Them & What We Like So Far
Federal Couragia MT Tire Review Is this the best mud tire available in 235/75/15? The options for finding a good mud tire in 235/75/15 are
Rugged, Affordable Wheels For Your Off-Road Subaru Build
Rugged Wheels For your Subaru That won’t break the bank Get your Subaru trail-ready without spending thousands If you want to fit a bigger, more