Additional WRX Reading Material...
Get inspiration from real people as you build your Subaru

How he built it, plus 4 things to look out for when lifting a WRX
By Ben Boxer
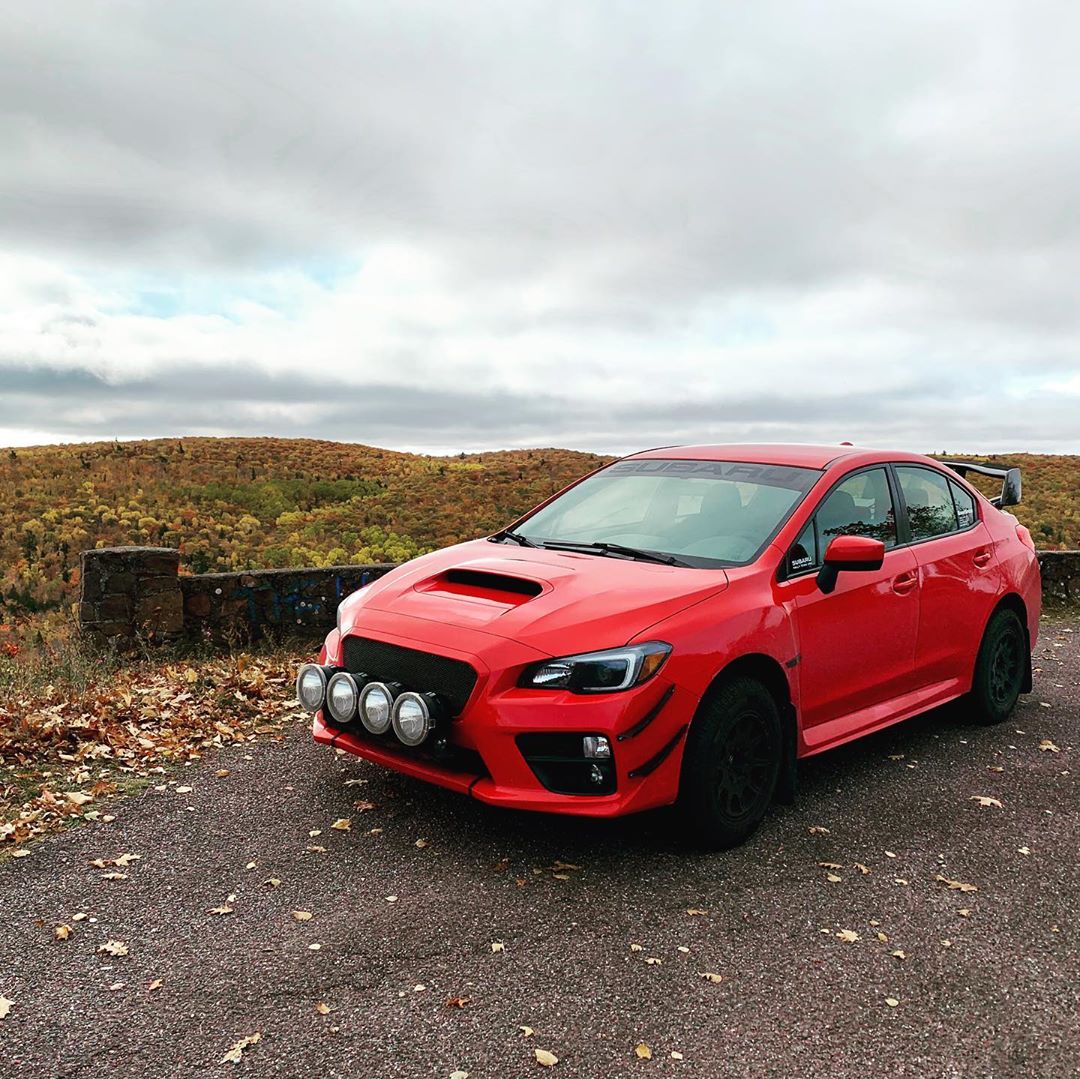
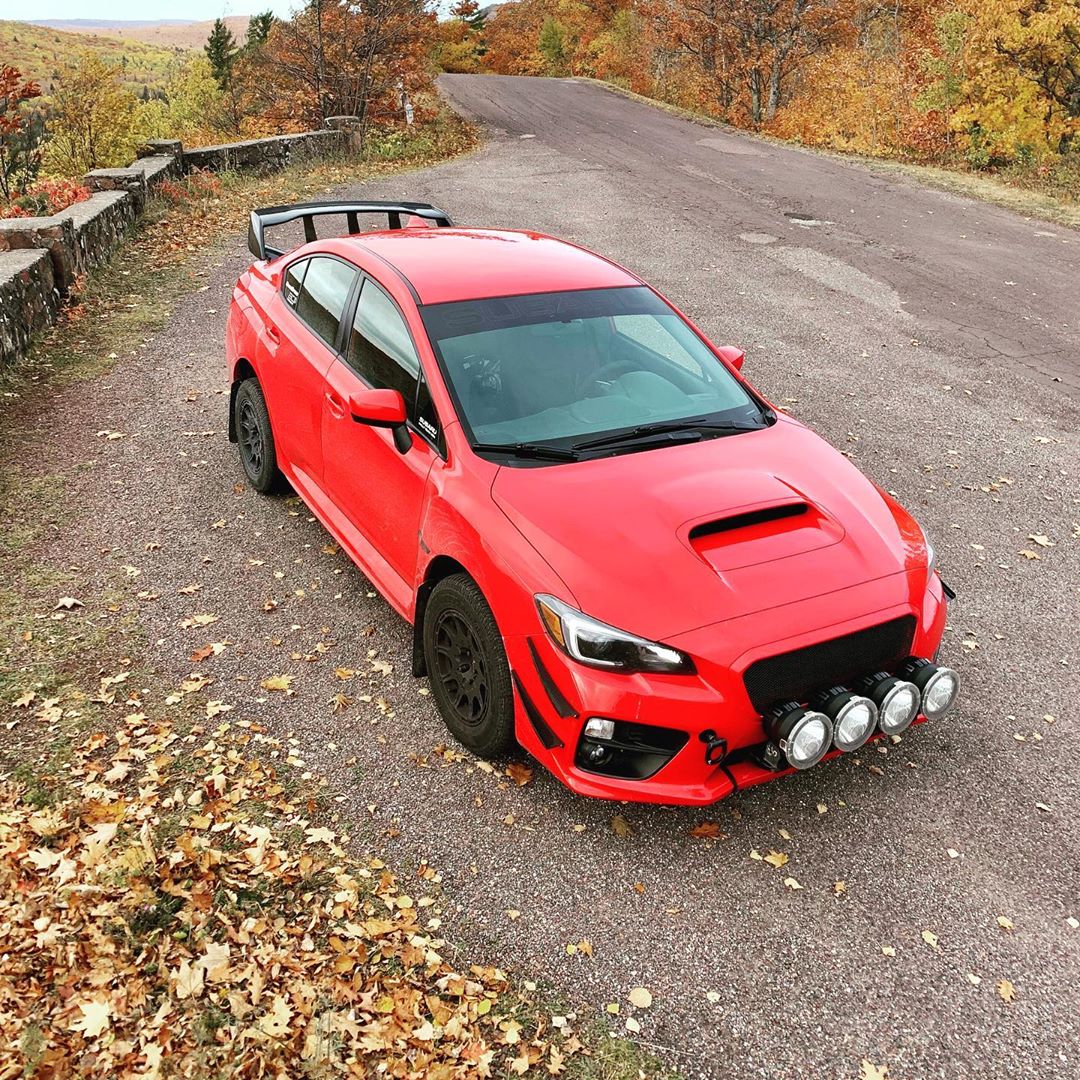
I initially saw Kevin’s red 2017 WRX on Instagram (@heritagelivery) and was blown away by his attention to detail and his brazen decision to take an essentially brand new WRX and lift it. I decided to reach out and ask if he would be interested in letting me share his build info on the site to encourage others who might be considering this route. He agreed and we had a great conversation about the process he went through and things that he wanted to help others look out for.
Take a minute to read through his build process and the helpful insights that he has for anyone thinking about lifting their WRX. If you’ve been contemplating the idea of making your WRX more capable off-road, Kevin’s experience will help you figure out your next steps.
I’ve been following your build for quite some time and it’s one of my favorite off road Subaru’s. What caused you to do something so crazy and rally a brand new WRX? Some people may be debating going the same route as you and just haven’t seen enough info on it to decide to pull the trigger.
“Well, this one’s a bit of an interesting answer! When I was in the market for cars, I was considering a Ford Focus RS, Mitsubishi Lancer Evo X GSR, and Subaru WRX STI, and my order of interest was that same order. I knew whichever car I got, I was going to turn it into a lifted car with all terrains and make it into a pseudo rally car for the road. The RS was too expensive because it was brand new, then the Evo X became too expensive when I got an insurance quote, and I disqualified the STI for the same reason as the Evo. So then I decided that a WRX might not be the worst contender. I knew at the time that if I went with an STI, I’d have to ditch the brakes and the suspension, and I much preferred the FA20DIT motor.
So I decided to just buy a WRX and knew I’d be upgrading and swapping things left and right, but at least it started at a cheaper price point than the STI. I wanted it to be a car that still maintained its performance and handling, but I wanted to increase its capability to a reasonable amount off road while not giving up too much on road. While I wanted the car to not get beat up off road, I still wanted it to be able to put a smile on my face when I floored it on a freeway entrance ramp! So with that, I began my journey to transform the car into a fun off road performance machine!”
“Yup! This was actually the first Subaru I’ve ever owned or worked on! I had never lifted any vehicle before, so it was all new to me!”
“I personally used King raised springs (~1.3” of lift) and Subtle Solutions 1” aluminum top hat spacers. Those were the only components that affected the ride height, but I also upgraded to GTWorx Cup Sport shocks and struts and went with Rallitek adjustable end links for the front and rear.”
“Well, this is the tricky one! No other parts truly “need” to be changed out to work. It is possible to run this setup with just those springs and the top hat spacers parts and be just fine. If you are concerned about the angles that your sway bars will be at, then you can replace the end links with some adjustable ones and you’ll be able to keep that angle the same as the stock one. If you are concerned about the camber changing in the rear when you lift it, you can replace the OEM lower control arm with an adjustable one. Another solution to this is to add subframe spacers, as by lowering the subframe your suspension geometry will be closer to the stock angles, meaning the camber will be closer to stock. If you are running much larger tires, it may be worth considering getting adjustable trailing arms for the rear suspension, as these will control how far forward the wheels are in the wheelwell.”
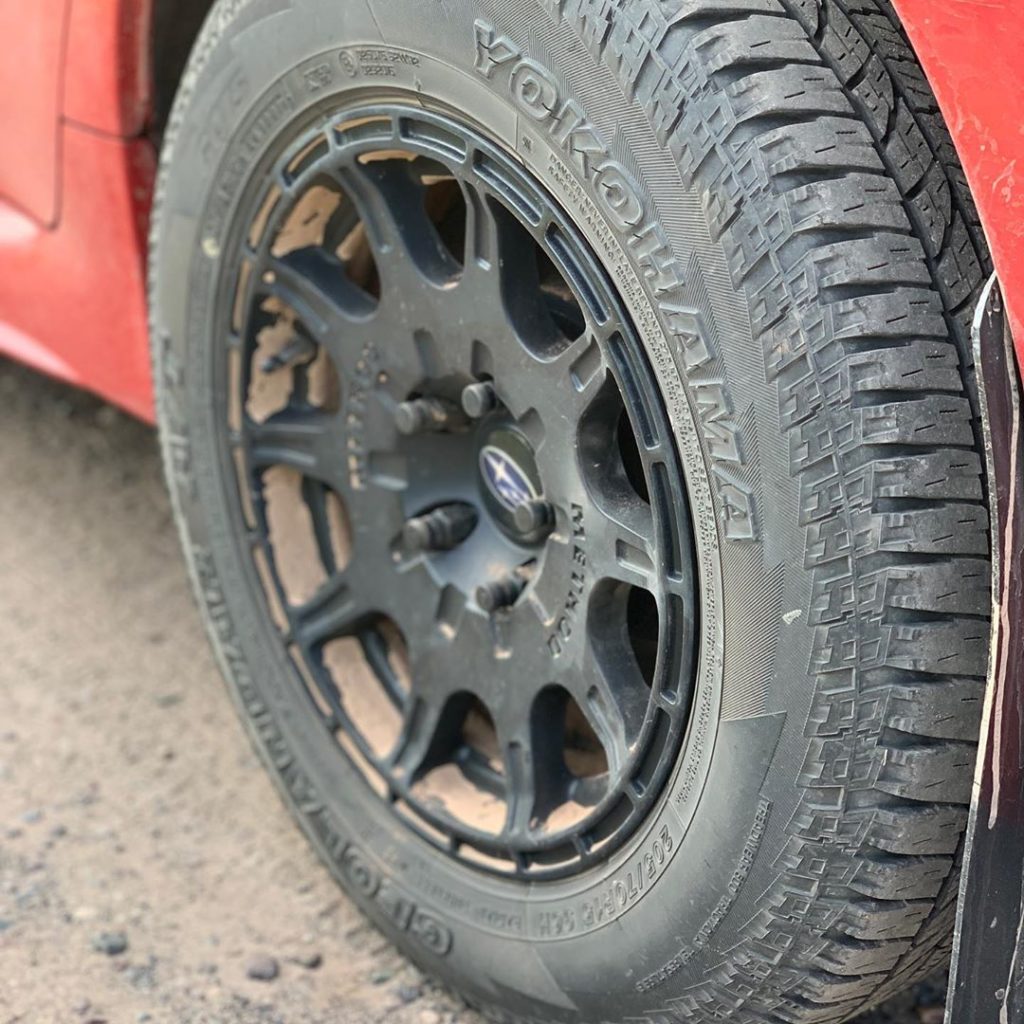
“I am running Yokohama Geolandar AT G015 205/70R15 tires. They are a slightly less aggressive all terrain, although they still do just fine off road and in snow, but don’t have the excessive on road noise that is common for all terrains.”
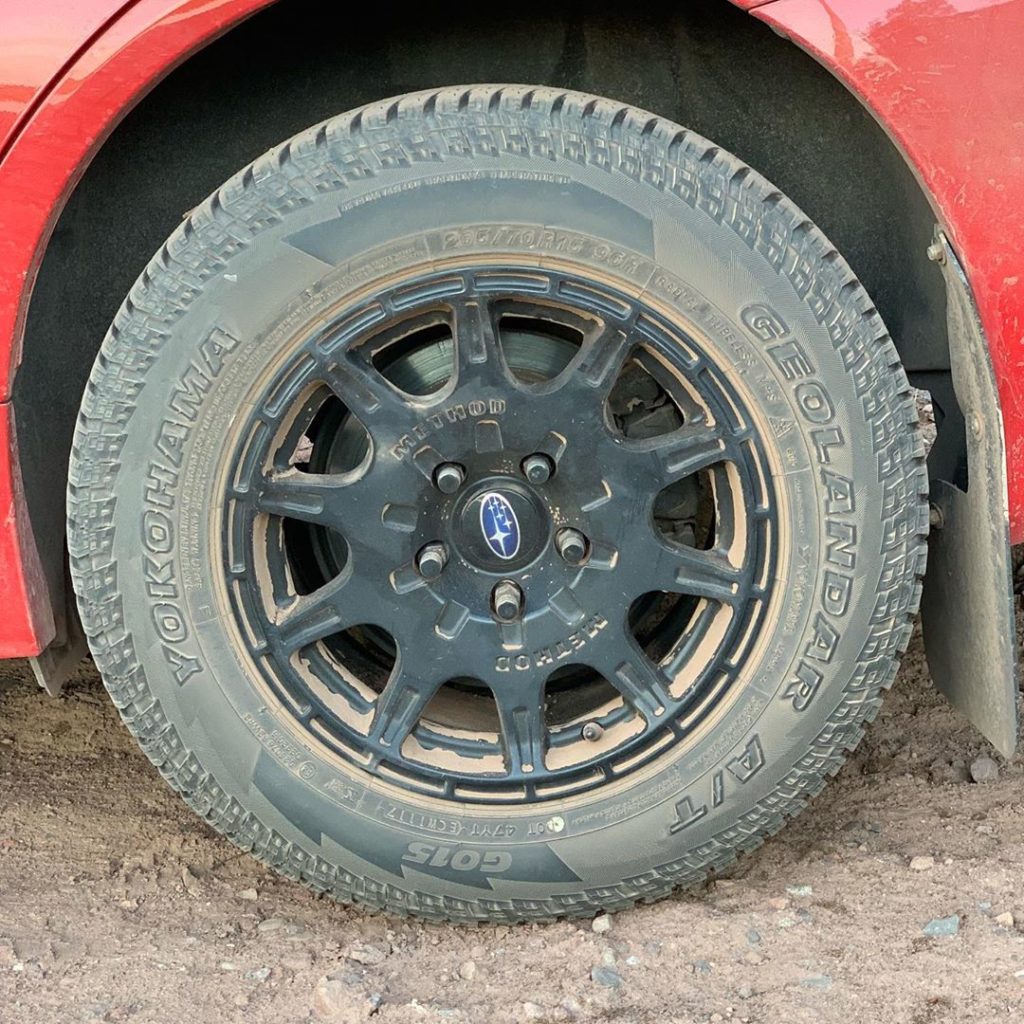
“These tires required no trimming at all to fit. The only thing that needed to be modified was the Rally Armor front mud flap bracket, as the innermost arm of it needed to be bent back just a tad more than it is originally.”
“The main adventuring I do with the car is to go to rallies and spectate them, as I’m a huge rally fan! I’ve taken the WRX to LSPR four times, NEFR one time, and Sno Drift one time! While at NEFR, I drove my car to the top of Mt Washington! While at Sno Drift, I had to take a lot of pretty interesting back roads to get to the stages while they were covered in a ton of snow! While at LSPR over the years, I’ve crossed streams, 3 wheeled the car, driven down trails that are only a couple inches wider than the car, and gone through mud pits! I’ve also taken the car on actual rally stages (not during the event) to see how much fun it would be! Other than that, it’s been there as I’ve gone camping in the Great Smoky Mountains National Park and will be there when I do more of that next summer!”
Some of the big concerns with lifting a ‘15+ Subaru are camber correction, CV shaft angles, and rear wheel location in the wheel arch.The first issue, camber correction, is an issue which can be addressed a couple ways. The front of the 2015+ WRX and STI allows for camber correction no problem, but the rear on the other hand, does not. You can remedy this by getting rear subframe spacers of equal size to the lift of the car, which will just maintain stock geometry for camber. The second option is to get adjustable lower control arms, which will allow you to keep your rear subframe tucked up and out of the way, but also able to adjust the length of the control arm so that you can correct the camber. I personally did neither, as I am not a fan of how much negative camber these cars come with from the factory. I believe I may eventually upgrade the lower control arms though, as I’m not that fond of how they feel and I think I want to do a little more negative camber but not the stock amount.
The second issue, the CV shaft angles, has always been a concern, although there’s no real way around it. The rear can be corrected by doing the subframe spacers to get the angle back down to stock. The front cannot be modified, as it would require lowering the engine and transmission. I’ve just kept and eye on the CV shafts as I’ve kept the car, and haven’t had any issues. When I did the STI transmission swap, I chose to use the STI CV shafts instead of the WRX ones, and this gave me a chance to really inspect the WRX ones, which had been used for about 20k miles with the lift. They showed no signs of extra wear, and seemed to be fine. Other companies, such as Rallitek, have expressed a similar opinion, with stating that 2.5” is pretty safe in regards to the CV shafts, and anything more can work but may wear out the joints sooner.
Get inspiration from real people as you build your Subaru
“I think the one thing that people should know is to figure out their intended use before lifting the car, as that should play a huge role in deciding HOW to lift the car. For instance, if someone just wants to run larger tires or just wants a little extra ground clearance, then they only need to use top hat spacers, as these effectively just move the top limit of the suspension down. If you have 1” spacers, then tires with a 1” larger radius would go to the same point at the top of the wheel well. This scenario also means that the center of gravity is taller without having anything to counter it, so body roll will increase. If someone wants to just get a little extra suspension travel but is going to use the same tires as stock, then really they only need new springs or taller coilovers. If they do this though, it is important to note that the tires will go up to about the same point as stock when the suspension is fully compressed. This also has the added benefit of being able to actually counteract the higher center of gravity because the springs will be stiffer than stock. If you want to run larger tires and have more suspension travel, then the best choice is to do both springs and spacers, albeit at the tradeoff of being the most expensive option.I guess a couple other little pointers would be to not neglect the other little changes and costs. When most people lift their cars, they usually go with larger tires. As we all know with AWD cars, the tires need to be the same diameter. It would be a wise investment to run a full size spare, so that you won’t damage your car if you need to swap on a spare. I usually just rotate all of the tires every other oil change so that I’m wearing down 5 tires instead of just 4. Another thing is that a ton of people run mud flaps on their cars. If they lift their car 2” or whatever, those same mud flaps are no longer very effective. That’s why I bought a sheet of urethane and cut out new mud flaps that were longer and installed those to my old Rally Armor brackets!”
First of all, we have the STI transmission swap! That one may have been the biggest hassle of anything I’ve done to the car, but it’s an awesome upgrade! I bought an STI trans swap kit from EBay, and it took me a long weekend to install it. While I had it out, I upgraded the clutch and flywheel to Exedy units, went with IAG transmission and pitch stop mounts, and replaced like everything on the shifter with new stuff from Kartboy. Once I finished that, I had no way to control the DCCD, so I bought a MapDCCD controller and had Understeer R&D install that. The MapDCCD allows for manual mode, automatic mode, and 4 different terrain maps for the center differential. So I went with gravel, autocross, wet, and snow.
Secondly, I have the engine mods! I’ve done a Grimmspeed intake, EBCS, charge pipe, TMIC with thermal dispersant coating, and catted downpipe. I also have IAG EGR delete, TGV deletes, and AOS. Lastly, I have the Killer B headers with the Swaintech coating. I have a Nameless catback with muffler deletes. The tune was done at Boost Controlled Performance in Livonia, MI, on 93 octane. I made 301whp/301wtq on a fairly conservative tune.
Lastly, there’s a couple more unique things I’ve done! I had issue with my first light rack in the front, and designed my own one that is MUCH stiffer, and had a shop fabricate it off of detail prints that I made. Since that became a more permanent piece, I cut apart the front fascia, just below the lower grille, so that I could remove the front fascia while still keeping the light rack installed. I also cut apart my rear fascia to get rid of the plastic fake diffuser where the F1 style brake lights are usually installed. I’ve also added quite a few lights to the car! I added 4 Vision X 6.7” Light Cannons to the light rack, replaced my high and low beams with PIAA LED bulbs, and replaced my fog lights with BajaDesigns Squadron Pros! And I don’t think anyone would look at my car and not immediately notice the aero upgrades! These were done with a purpose in mind, as I was trying to improve the grip and handling of the car after switching to all terrains. I had a lot of grip issues in the back end especially, since the car is so light in the rear. I added the Seibon carbon fiber STI wing and lip spoiler first, then added my own homemade carbon fiber wing stabilizers, then the Subispeed carbon fiber gurney flap, and lastly the Verus Engineering front dive plane kit and the rear diffuser. These all may look excessive, but they’ve drastically improved the feeling and handling of the car on road!
Next, I think I plan on fine tuning the suspension and drivetrain. I think I will be upgrading the rear suspension a lot, as it could use being tightened down a bit. I am planning on adding adjustable lower control arms, adjustable rear trailing arm, and new rear toe links. I may also replace the rear differential carrier and some of the bushings in that, so that I can get the back end a little more firm.Other than that, it’s mostly just little odds and ends! I may upgrade the rear brakes, but I won’t do that until the rear brakes need to be changed. I’m also going to add front brake ducts, but the backer plate for it may make it interesting since I have smaller brakes in the front. I may also invest in a different seat in the car so that I don’t move around quite as much. I’m also thinking about flocking the dashboard so that I can cut a little extra glare off this car.I’ve got big plans down the road with it, but that’s mostly dependent on life and how much I want to throw at this car! I’ve always dreamt of doing a built block with a big turbo kit and letting this thing go completely crazy, but it all comes down to money!
As an Amazon associate, we may earn from qualifying purchases.
Other Articles You May My Find Helpful With Your WRX: